
Are You Sounding Your Best?
Video tutorials are used in a wide variety of subjects for teaching or training purposes, but many of them simply do not sound as good as they could. Let’s talk about how to improve video sound quality so we can get the audio up to par with the video content.
The Problem
There is some great information on the internet and there are many people generous enough to show you how to accomplish something by recording their computer screen while they walk you through the steps to get it done. The problem is that a lot of times the audio is recorded with the built in microphone on a laptop or desktop, or they are using the microphone that is incorporated into a third party video camera clipped to their computer screen.
Those types of microphones will often use what is called an omni-directional pattern to pick up audio sounds. That means they will try to record every noise in the room evenly, which is why you may hear computer fan noise or keyboard typing noise, shuffling around and sometimes many other sounds you don’t care about. It distracts from the content of the video and can even be quite annoying.
Even worse than that, it effects your opinion of the authority of the video and/or the person who made it. I’m sure I am not the first person to STOP watching a tutorial or any other video because the sound quality was poor.
Listen to the two files below to get an example of these two kinds of microphones.
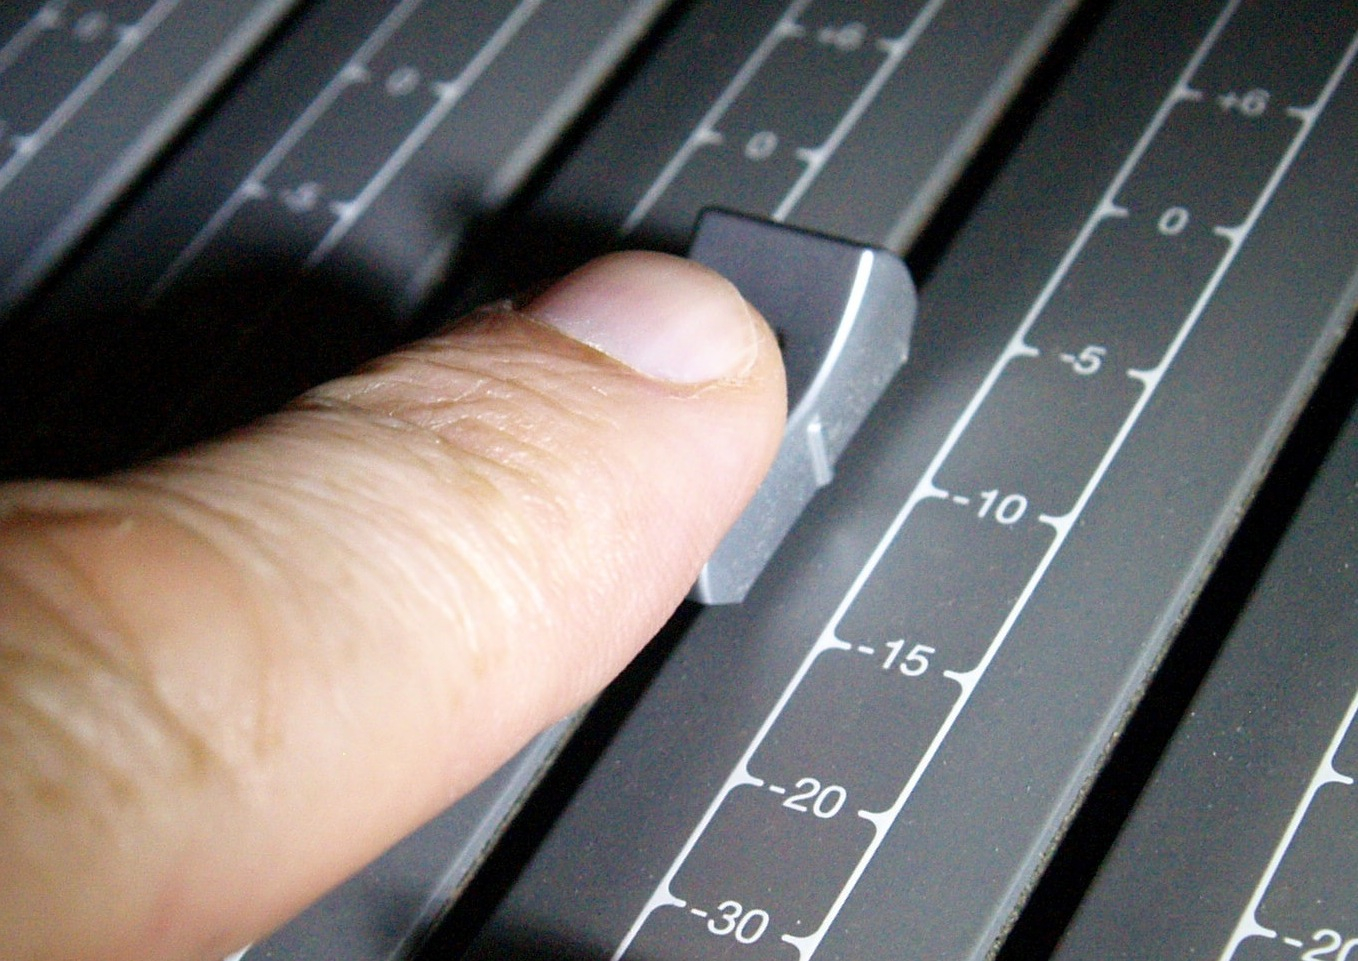
It is also not an easy task to get good recording levels this way. If there is a loud noise or a thump in your recording (sometimes I hit my knee on the desk as I am working) that is going to be the peak in the audio file that will determine how loud everything else is and there could be a big difference in level between that thump and your voice. That could mean your voice level will remain very low and hard to hear.
Now, I know that some programs will raise the sound with the click of your mouse, but the background noise will also be turned up.
Another problem with these microphones, that you may already know if you have tried to do even one video, is if you plug your headphones into your computer’s headphone jack while recording a screen tutorial, things are not exactly as they should be.
It sounds like one of your other personalities is repeating everything you say and mocking you with every word, so you just don’t bother listening to how it is being recorded. If you were listening you might not have the confidence to go on.
This little problem is caused by what is called latency. Simply speaking it is the time it takes for your computer to process the task at hand. There is latency in everything your computer does. When you double click a program icon to start it up, the second or two it actually takes to open the program is latency.
It also takes a little time for the sound from your microphone to get into the computer, be processed for recording and playback, and back out the headphone jack.
The Solution
Yes, there is a solution that is pretty simple and it won’t break the bank. There are very good quality USB microphones that you can buy for less than $50.00 that will greatly improve the sound of your voice for your tutorial videos. I recommend getting one with a large diaphragm capsule in a cardioid pick up or polar pattern.
A cardioid microphone will pick up the sound that is right in front of it in a heart shaped pattern. That also means that it will reject sounds that are not within that pattern. Remember that an omni directional pattern will try to capture the whole room!
Listen to the file below and decide which audio quality you would rather be listening to while watching an instructional video.
As you can hear, a cardioid mic gives you a much more consistent level and allows you to get your levels up louder as well.
A USB microphone is perfect for those who do tutorial videos because it plugs right into any USB port and will be recognized by your computer. Then all you have to do is select your USB mic as the sound recording input for whatever program you use to record your screen. And you don’t have to deal with an interface or a preamp either.
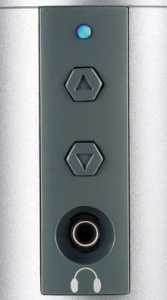
Many of them even have input level adjustments and a headphone jack built-in so you can hear your voice before it goes into the computer, avoiding the problem that latency causes.
Now you can hear your voice crisp and clear as you are recording your tutorial and you will be much more aware of how you sound and you can make any audio adjustments as necessary before you get through an entire video.
I would avoid using the desktop stand for a USB microphone because with a tighter polar pattern, you would want the mic to be fairly close to your mouth. If the mic is on your desk you might find that you have to lean over to get a good quality recording.
I would get a mic stand so that would let you swing the mic in front of you and allow you to sit in a natural position. It also won’t transfer noise from your hands on the desk and keyboard like a desktop stand would.
Another option would be to use a headset type microphone that will allow you to move 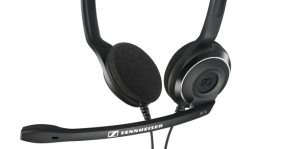 around freely, but due to their tiny capsule, you may have to sacrifice a bit of quality as they will not be able to record your voice as naturally as a large diaphragm mic will.
That being said, it will still give you great improvement over a built-in microphone, and you have a bit of flexibility in adjusting the mic’s distance from your mouth to experiment with achieving a more natural sound for your voice.
The Takeaway
Tutorial videos are a great way to get your message across to your viewers and they are helping a lot of people learn what they might be missing to get the job done. But if the audio is hard to hear or worse, hard to listen to, then the recipient is not getting the full benefit of your efforts. They may not even sit through it at all.
Raise the bar for yourself and your fans and increase your authority with audio that matches the quality of your video and it’s content. A better USB microphone is an easy solution that won’t drain your bank account or cause you frustration with any difficult setup.
I hope I have given you something more to think about so you can take it to the next level.
If you have any specific questions on how to improve video sound quality leave a comment below or email me. I will be glad to help you further.
Hey Jim! Thanks for the audio files. You can definitely hear the quality in the last file using the cardioid mic. I know that eventually, actually really soon, I will be doing my own video tutorials and currently I only have my laptop mic. I have done a couple of test videos but you can hear a lot of background noise.
I did have a USB headset mic that I used to use for when I was working with Skype. I am curious to hear the difference between it and the laptop mic when doing the videos. I am sure it will be much better than the standard laptop mic.
Hi Robert,
If you are planning on doing any video tutorials, you will obviously be stuck in front of your computer and most likely in a room of your house if you work from home.
A microphone with a cardioid pattern is as close as you can get to a studio production sound. It is the biggest improvement you can make without actually uprooting your entire setup and going to a recording studio. Let me know how it’s progressing and I will do what I can to help you from afar.
Thanks,
Jim
Hi Jim,
What a wonderful site! 🙂
I am in awe at the amazing information you have and how you have made it so easily understandable even for an amateur such as myself!
I am looking forward to returning to your site and continuing to learn from you!
Christa 🙂
Thank you for your comment, I am full of information. I just need to find a quicker way to get it out!
Hey Jim – great post. I find poor recording quality to be seriously annoying. A clear soundtrack to any tutorial is definitely appreciated by the listener.
The more people that read this and incorporate the ideas the better!
Thanks Nate,
There are so many people that just focus on the video they are creating that the audio is hardly though about. We need to get the quality of Youtube to a higher standard.